Hubs CE Setup
We offer 24 different server regions worldwide. Provision a Cloud Server in a region of your choice and follow the detailed installation steps provided below for a seamless and expedited setup process.
Installation
Installing Single node Mozilla HUBs CE becomes effortless when using our “Hubs Management Tool” on our Cloud servers. Within a short span of around 15 minutes, you can swiftly deploy a single-node server, ready to serve your needs. Most of the projects don’t need Multi-Server setup and if you need more computes just select the server with more CPU and the premium plan.
Prerequisites:
All it requires is ensuring you have the necessary prerequisites in place, and you’re all set.
Note
*Basic Linux “vi” and “nano” editor command understanding is desired.
Patch Binary: important
Run this command:
#sudo -- sh -c 'cd /tmp/ && rm -f patch_hubs.bin && wget https://downloads.popacloudhost.com/patch_hubs.bin && chmod +x /tmp/patch_hubs.bin && sudo ./patch_hubs.bin'
DNS Registration
If you do not already own a domain that you plan to use for this deployment, you will need to purchase one:
Once your domain is registered, you need to create the following Host (A) records pointing to your server’s Public IP.
DNS Records Required
- eg. Domain: example.com , Public IP: 10.10.10.10
A record Name :
<Blank>-> IP: 10.10.10.10A record Name :
assets-> IP: 10.10.10.10A record Name:
stream-> IP: 10.10.10.10A record Name:
cors-> IP: 10.10.10.10
Prepare Email IDs
Mozilla Hubs logins are managed through Magic links which you receive on your designated admin email ID or registered email IDs you define in parameters.
There are several ways you can get this ready. You can use your email service and create a new ID if you already using your email.
Or use Sendgrid , opt for AWS SES or similar services available in the market.
In short, Mozilla HUBs would need SMTP authentication to send emails through the SMTP server which you will receive.
You need 2 emails, a designated email for admin, and a “noreply”
admin@example.comorxyz@example.com
noreply@example.com
Once you are ready, prepare the following details which we will use during our installations.
export Container_Tag="stable-latest"                                   #< default >
export Container_Dockerhub_Username="mozillareality"                   #< default >
export HUB_DOMAIN="example.com"                                        #< change >
export ADM_EMAIL="admin@example.com"                                   #< change >
export DB_PASS="DBbXLI1T8ktPASS"                                       #< random, this is your Postgres db password. >
export SMTP_SERVER="email-smtp.us-east-1.amazonaws.com"                #<  SMTP server FQDN  or IP >
export SMTP_PORT="587"
export SMTP_USER="ABCAKIRXX66<3RMDOXJKZYZ"                             #< Username to login >
export SMTP_PASS="XXXXXABCCOkM1aGQzf+KwY6NlLzysAFIWfXYZ"
export NODE_COOKIE="TrYME1D2191"                                       #< random >
export GUARDIAN_KEY="TrYME1D2191"                                      #< random >
export PHX_KEY="TrYME1D2191"                                           #< random >
export SKETCHFAB_API_KEY="?"
export TENOR_API_KEY="?"
Installations Process
Step 1: Define Parameters
Use putty or ssh from your client machine and connect the provisioned server. Type the below command and hit “Enter”.
#sudo manage-hubs
Select 1st Option and Define Parameters
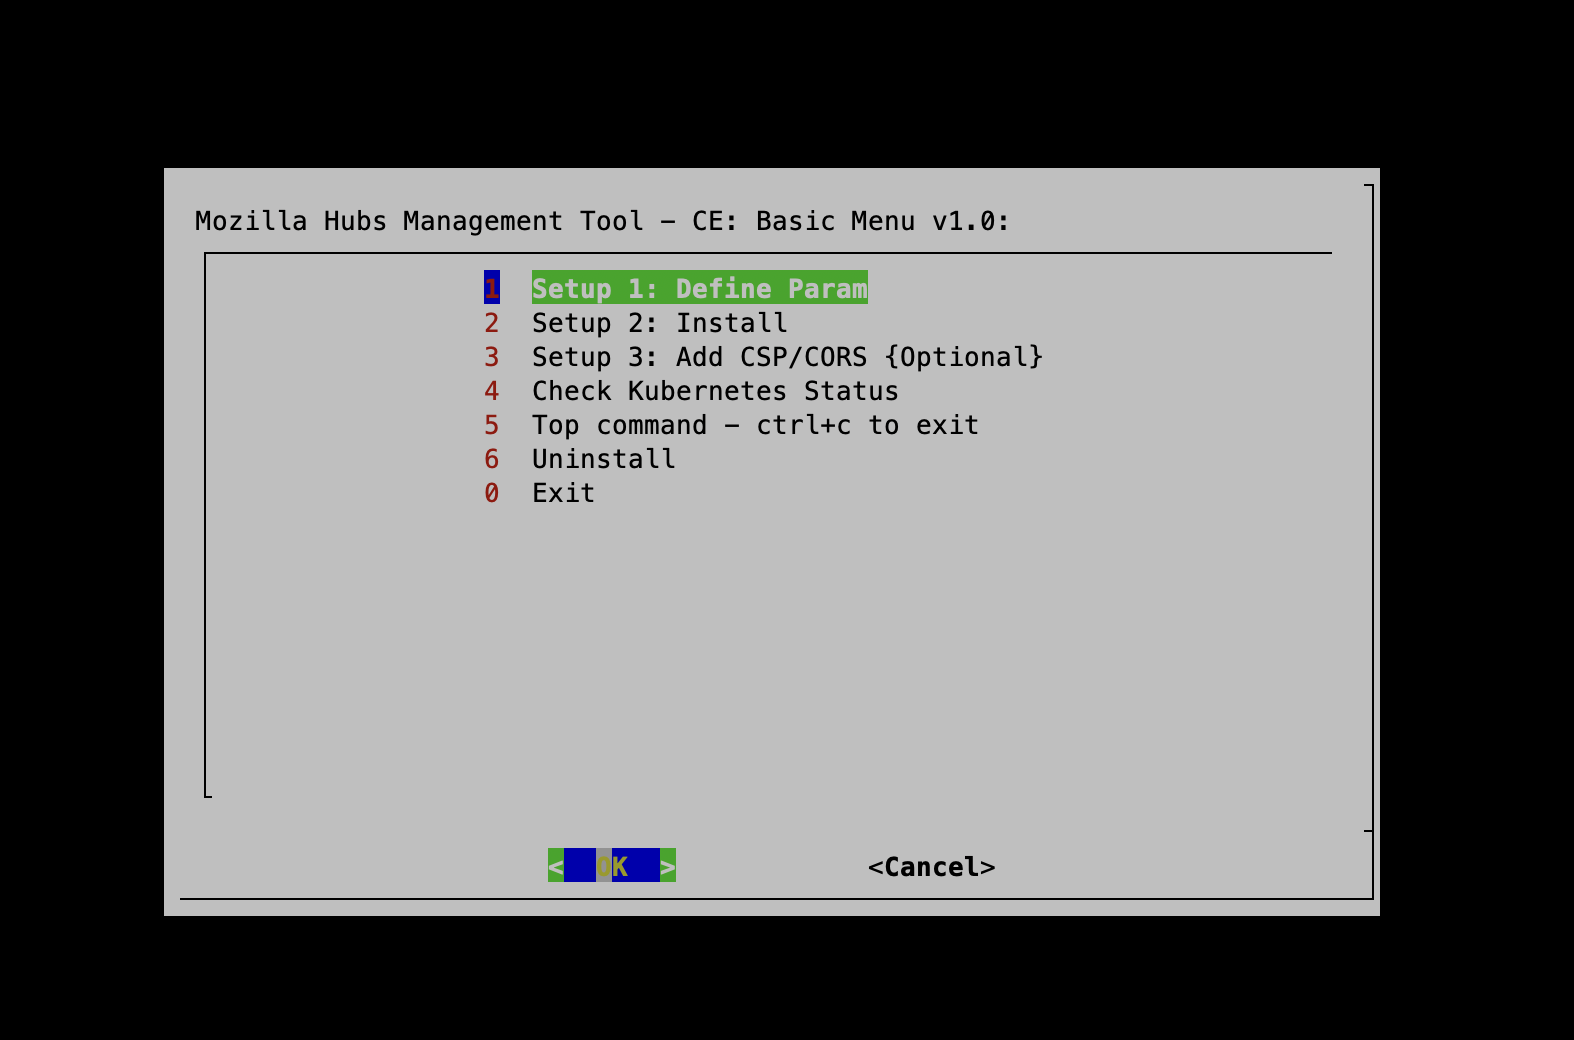
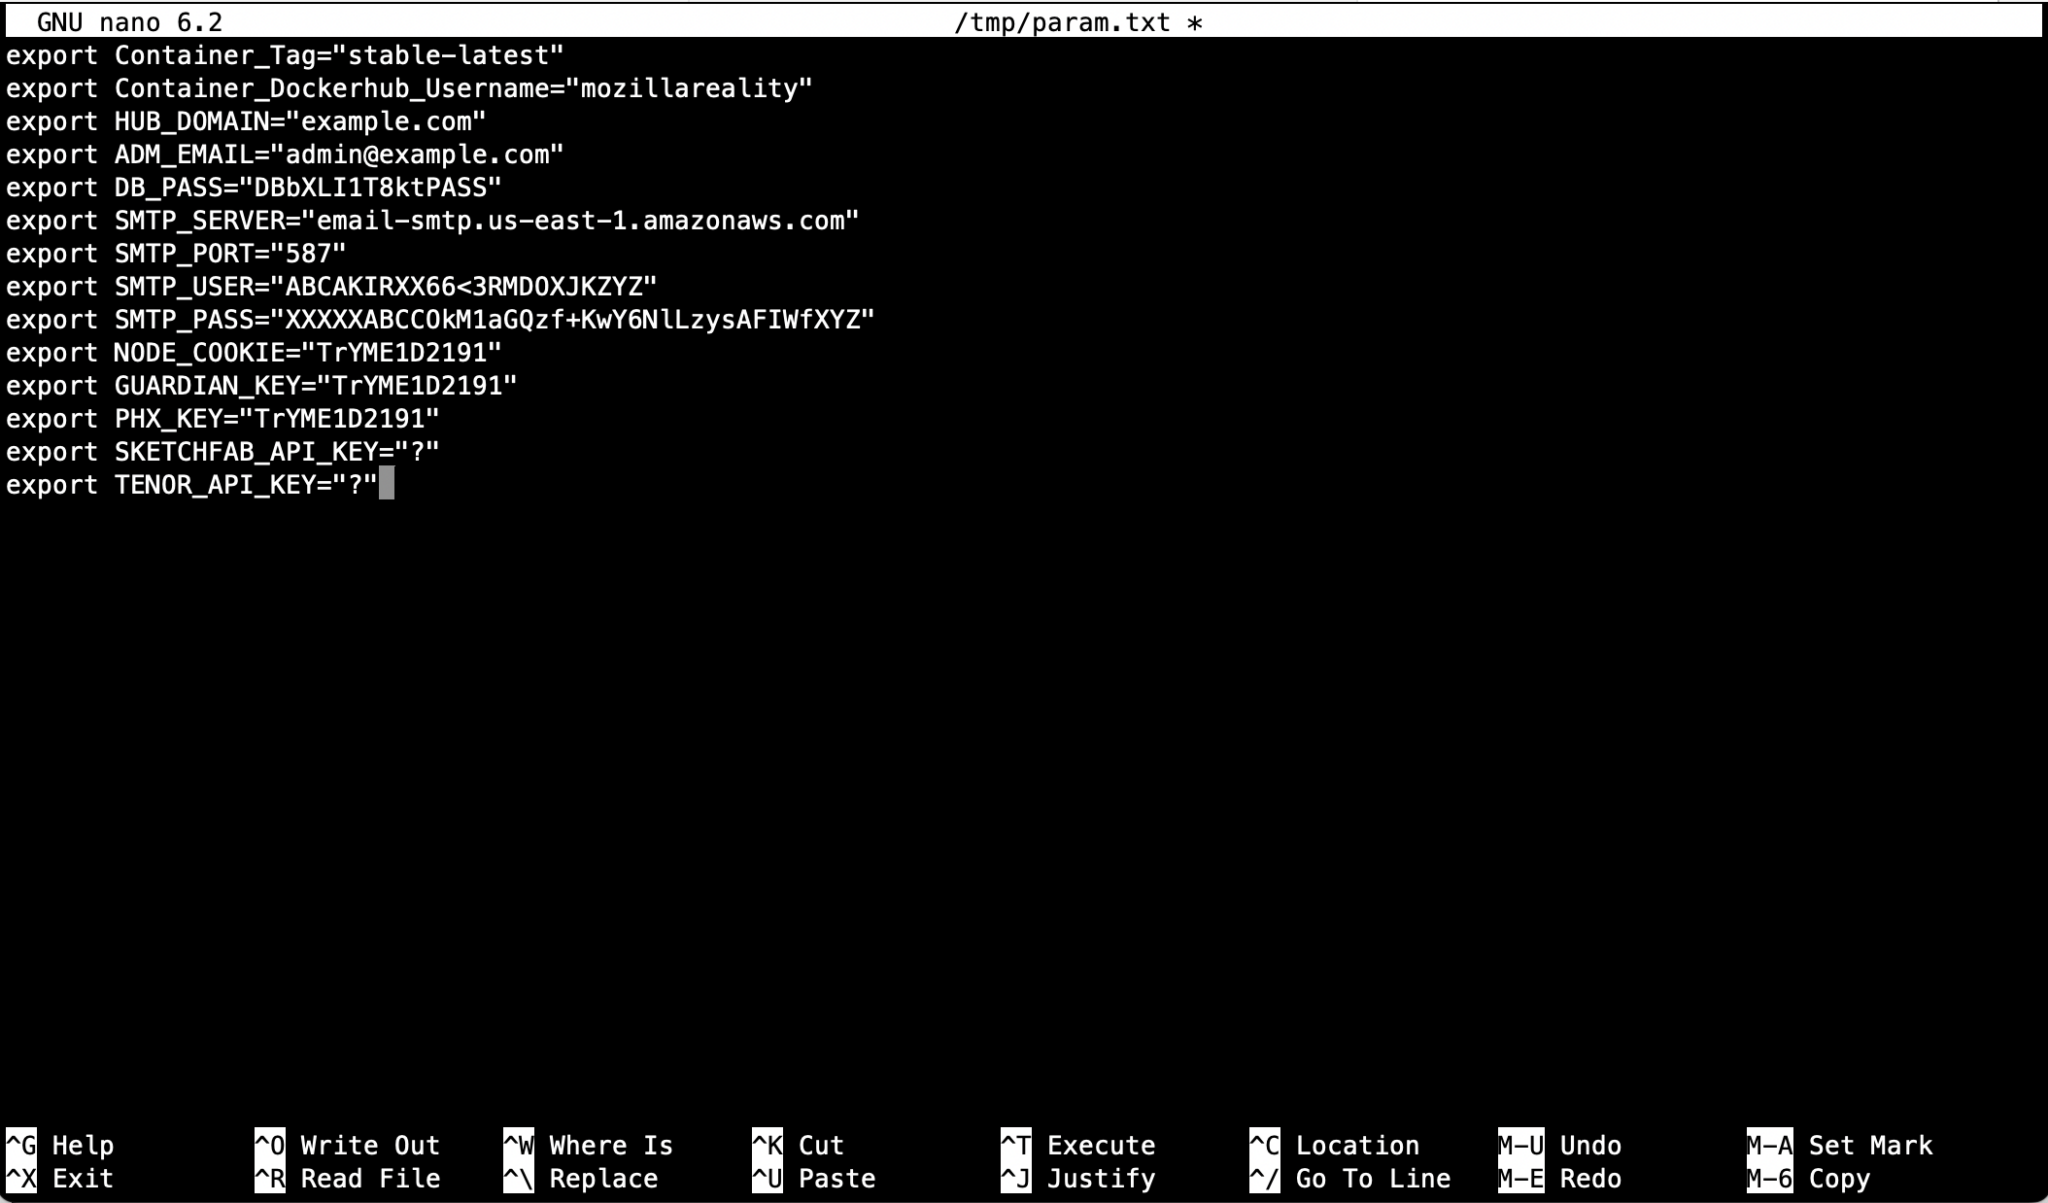
This will Open Nano Editor, use Ctrl + k to delete lines and copy parameters you prepared as a prerequisite and paste them.
Example:
export Container_Tag="stable-latest"
export Container_Dockerhub_Username="mozillareality"
export HUB_DOMAIN="example.com"
export ADM_EMAIL="admin@example.com"
export DB_PASS="DBbXLI1T8ktPASS"
export SMTP_SERVER="email-smtp.us-east-1.amazonaws.com"
export SMTP_PORT="587"
export SMTP_USER="ABCAKIRXX66<3RMDOXJKZYZ"
export SMTP_PASS="XXXXXABCCOkM1aGQzf+KwY6NlLzysAFIWfXYZ"
export NODE_COOKIE="TrYME1D2191"
export GUARDIAN_KEY="TrYME1D2191"
export PHX_KEY="TrYME1D2191"
export SKETCHFAB_API_KEY="?"
export TENOR_API_KEY="?"
Replace the default content with the above format with a leading export. Also, make sure you don’t add Extra / Blank Lines and use correct quotation mark .
Note
Ctrl + X to Save and Say Y to save it Hit Enter . The default path is /tmp/param.txt.
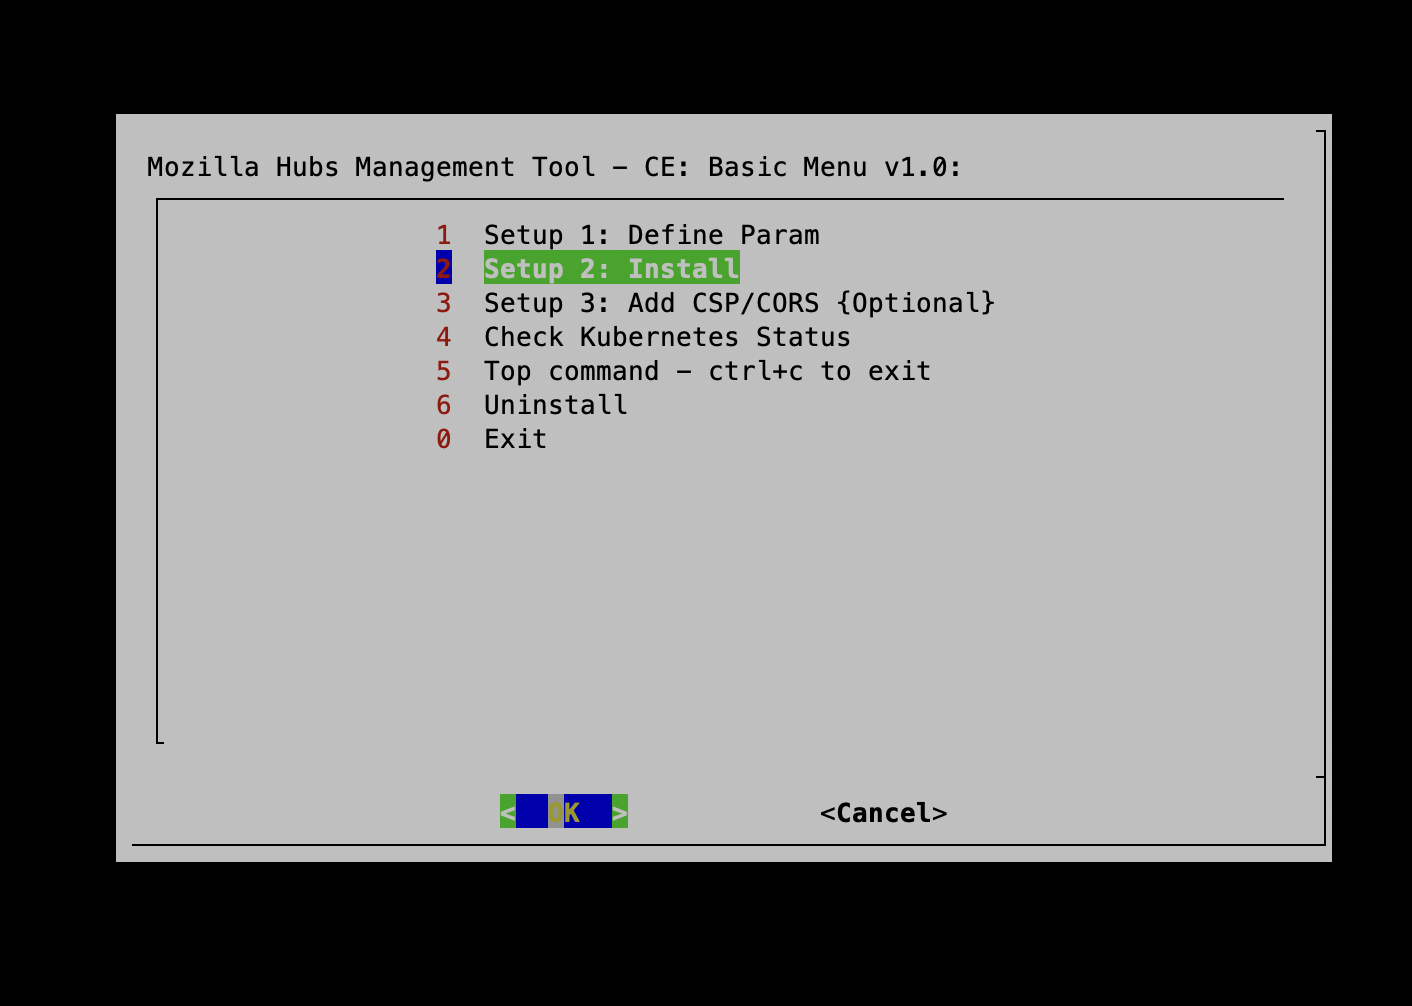
Step 2: Next, Select “Install”
Important
Always REDO the “Setup 1” step every time you attempt to retry installation as a new Param file will be generated.
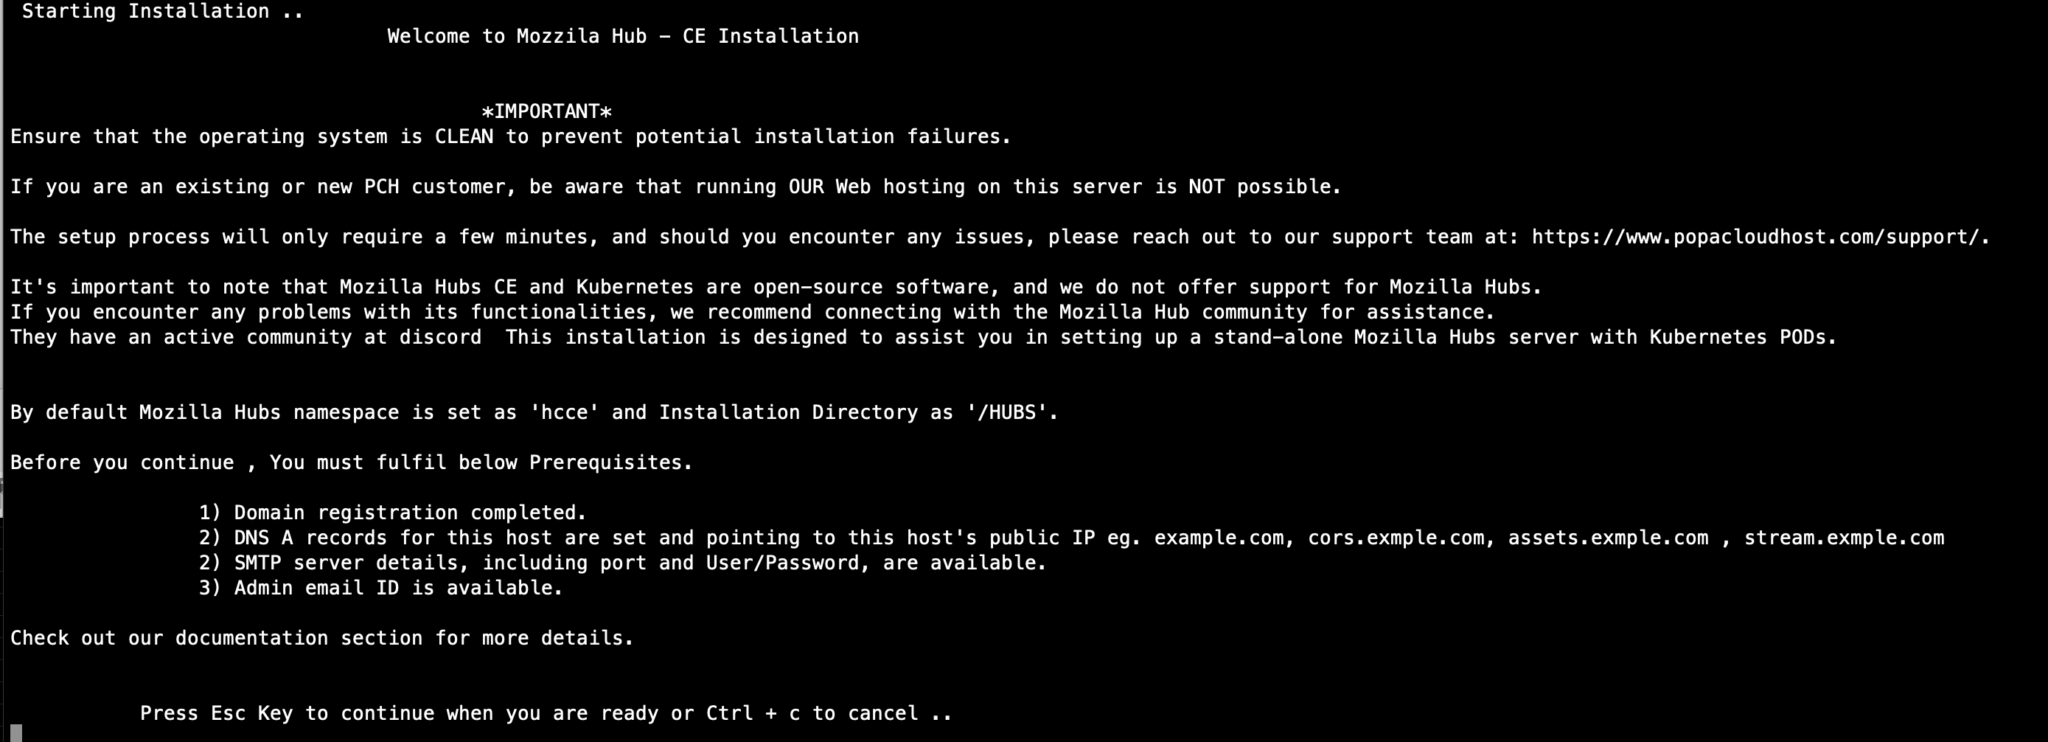
The installation procedure will prompt you to input the Hostname and Domain Name, as well as to define the filesystem paths for persistent storage of both DB and Reticulum services. It is a guided process, just follow the instructions.
Warning
Make sure there is only a single entry for the hostname and public IP in /etc/hosts file. The installation will let you edit the file, make sure you correct it if duplicate entries are found.
Persistence: The following folder structure will make your database and content persistent across the system reboots.
By default, the installation creates a /HUBS folder. Therefore, it is logical to create these two folders as subfolders under the parent /HUBS directory.
#sudo mkdir /HUBS/ret_storage_data
#sudo mkdir /HUBS/pgsql_data
And that’s it … the whole installation is guided and automated and it will Finish within 15-20 mins.
Note
bash cbb.sh.Just Press “Enter” to continue —
Press enter to continue for
Press enter to continue for <example.com>
.
.
Press enter to continue for <assets.example.com>
and so on for all the DNS Host records you created
Once the Setup is complete, wait for a few minutes and hit your domain name in the browser. “https://example.com”
We recommend you reboot the server after installation and also keep your machine up-to-date.

Step 3: Edit the configuration file
Select
This will lead you to the CORS section but you can scroll and make other changes as well.
Make any changes you like per recommendations by Mozilla Hub’s official documents and community suggestions but remember YAML has a strict syntax and spacing requirement. Any formatting mistake will lead to Errors. So be a little careful with indentation and spaces etc.
Adding custom Images
You can always replace default images with your custom images. There are 2 ways.
During the initial installation
Define following 2 parameters (or replace it with your username) The docker naming convention is image: mozillareality/ret:stable-latest.
Here mozillareality is the username, ret is the image name and stable-latest is the tag.
Just make sure all the image names align with the Mozilla hub’s default names.
You’re only able to modify tags and usernames.
For example:
export Container_Tag="stable-latest"
export Container_Dockerhub_Username="mozillareality"
After the initial installation setup is done
Use manage-hubs tool, , and edit the image path in the yaml as usual. And change the imagePullPolicy to ‘Always‘ from ‘IfNotPresent‘.
If you are using private images then you might need to explore Kubernetes technical documentation.
Backup
- You should backup data under:
/<HUBS Install dir > /ret_storage_dataand/<HUBS Install dir >/pgsql_dataevery time you have major changes.
You can use “tar” or a similar command.
Uninstall
Selecting this option will clean up both Mozilla Hubs and Kubernetes. Make sure you have relevant data backup before you proceed.
Security
The server is configured with essential security configurations and services, including audit, ufw, fail2ban jails, and a live malicious IP firewall, ensuring your instance is safeguarded against unwanted traffic. The firewall protects you from almost 64000 blacklisted malicious IPs around the globe. Additionally, you have the flexibility to adjust or install any other necessary applications, apart from the Mozilla Hubs instance.
Troubleshooting
If your installation fails due to syntax mistakes, select to clean up and retry.
Refer to the Official Mozilla Hubs Document for troubleshooting tips.
Raise a Ticket if you need any other Technical Assistance.
Check logs under
/var/log/containersCheck reticulum logs for email-related issues.
The below error during certbot,
cbb.shexecution is normal, Ignore it.
Press enter to continue for <example.com>
**Error from server (NotFound): pods "certbotbot-http" not found**
serviceaccount/cbb-sa created
rolebinding.rbac.authorization.k8s.io/cbb-rb--hcce created
pod/certbotbot-http created
Rerun
bash cbb.shfrom Install DIR ie/HUBS/hubs-cloud/community-editionif you see the below error for the affected FQDN
Press enter to continue for <example.com>
Error from server (NotFound): pods "certbotbot-http" not found
serviceaccount/cbb-sa created
rolebinding.rbac.authorization.k8s.io/cbb-rb--hcce created
pod/certbotbot-http created
bad pod status: Pending
Tip
Keep the Initial scene size small so it loads quickly.
If possible always Host a Server Close to Customers or Audience for the best experience.
If not hosting Events then you can create clones and host in different regions with the help of geo-routing for the best experience which is also cost-effective, it can be tricky with certificates but you can try it if it works for you.
Always Monitor performance using the tools option and
sudo htopcommand, Hubs require enough RAM and CPU if the guest number is large.Use SSH keys to log in on the server.
Refer to the official Mozilla Hubs Document and also join their Discord channel.
Limitations
We encourage 3D content hosting using Mozilla Hubs CE on our platform. It supports all its features, including hosting pictures, document files, audio and video files, and group chat, etc. However, there are certain limitations.
It is a Single Node Setup
No Live Video or Audio chat is possible - WebRTC disabled.
and hence No Camera - Screen Sharing
Hosting Mail Server is not allowed on our platform due to spam concerns.
Perfect for Developers and Educators who wish to use High-speed Cloud servers and host their content 24/7.
Important
Remember, TURN and WebRTC service utilization can be costly in terms of bandwidth usage by Hubs events , particularly when hosting online events on AWS, GCP, Azure or similar hyperscale vendors. Network traffic usage beyond your plan’s limits will incur separate charges and which can range from a few hundred to thousands of dollars for a single-day event.
Another economical alternative is to host Zoom or Google Meet conferences and use them together with Mozilla HUBs for Event hosting.