Install and Set Up Redis Cache for WordPress Performance Boost
Estimated reading: 6 minutes
Redis comes inbuilt with your plan.
And Redis can be enabled on a per-website basis. This setting is disabled by default. Once enabled the user will be provided with connection details and will be able to configure the redis.conf through the Control Panel UI.
Enable Redis on a website
On the website dashboard select then tools
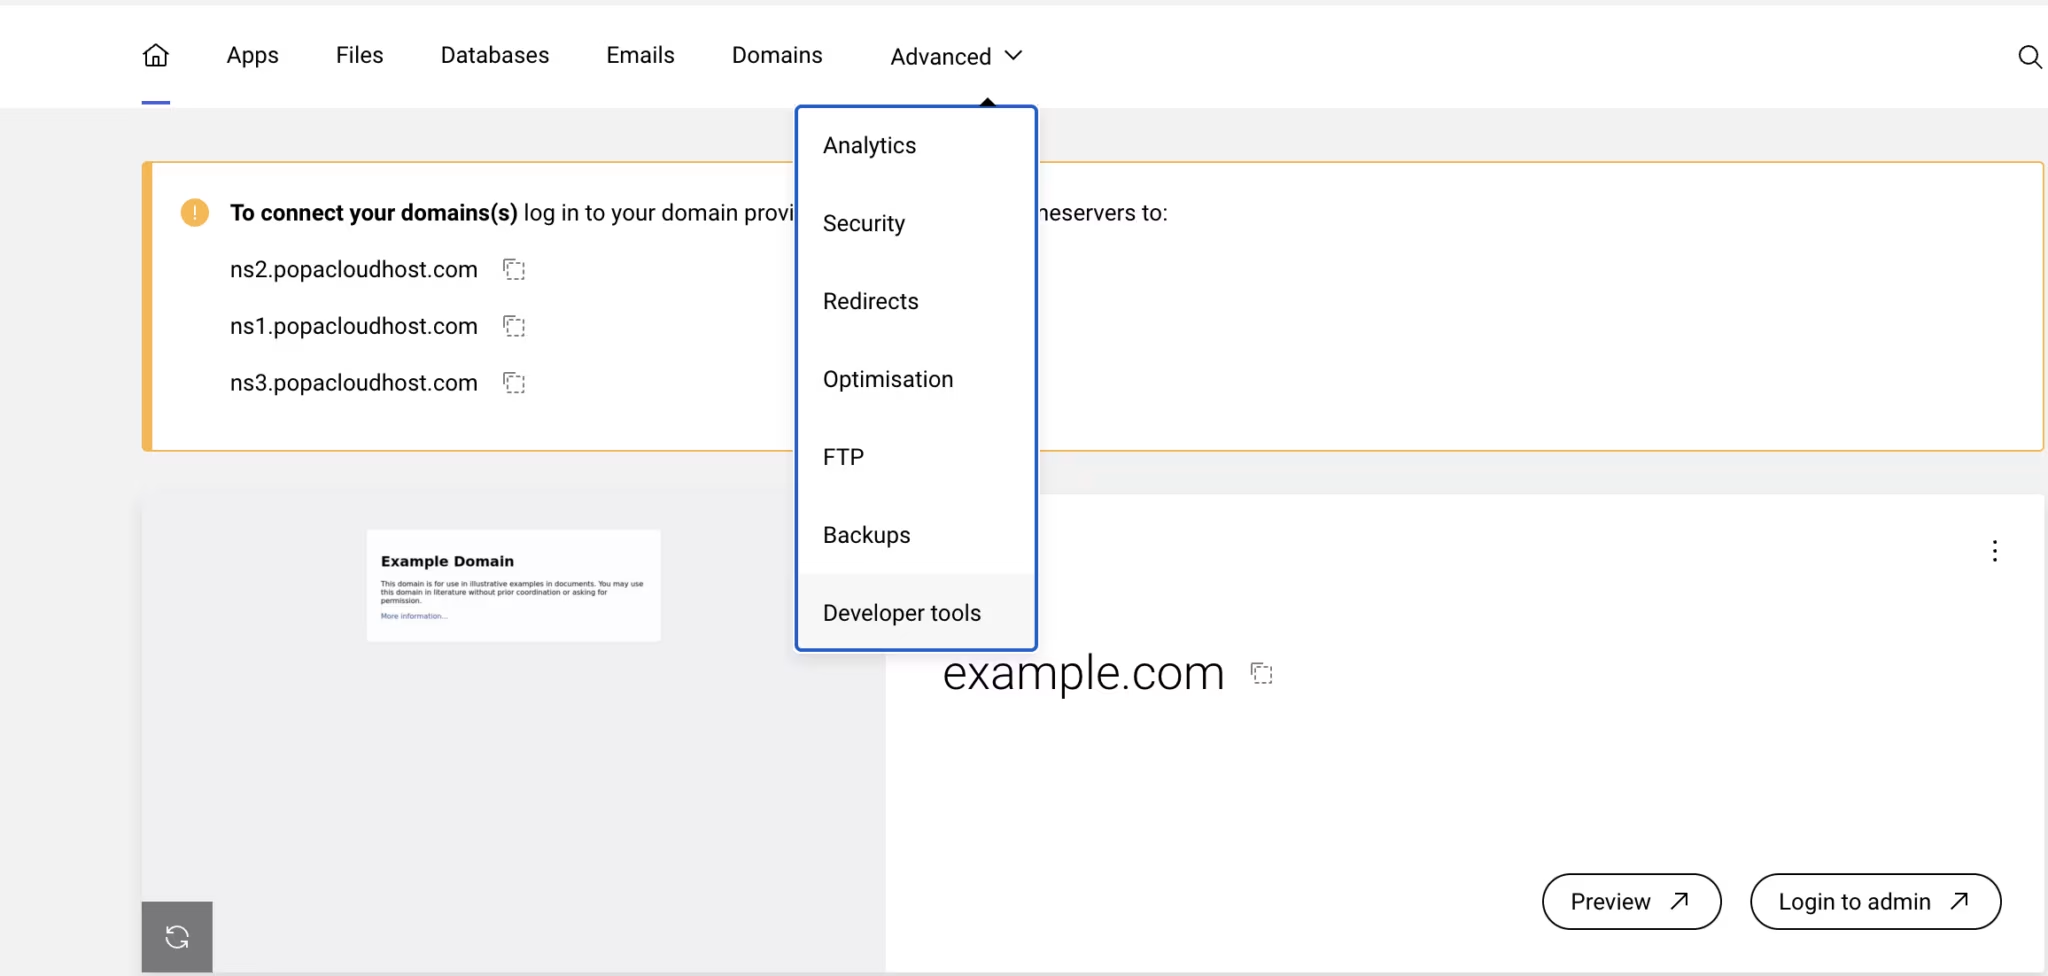
Scroll down to
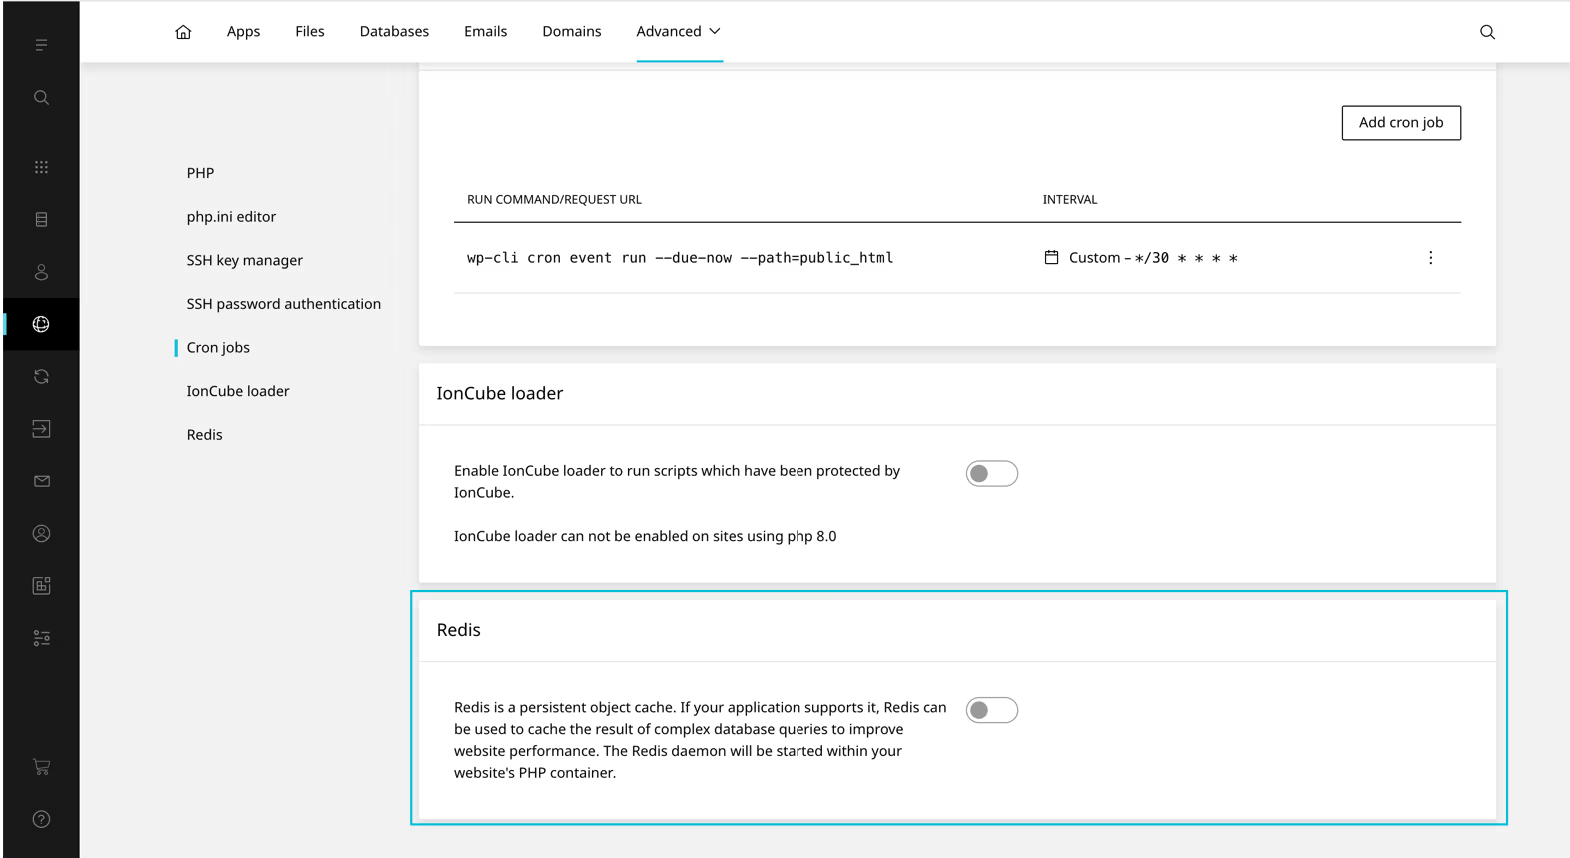
Toggle Redis OnInstall theLiteSpeed CachePlugin on the WordPress admin console and configure it as below.
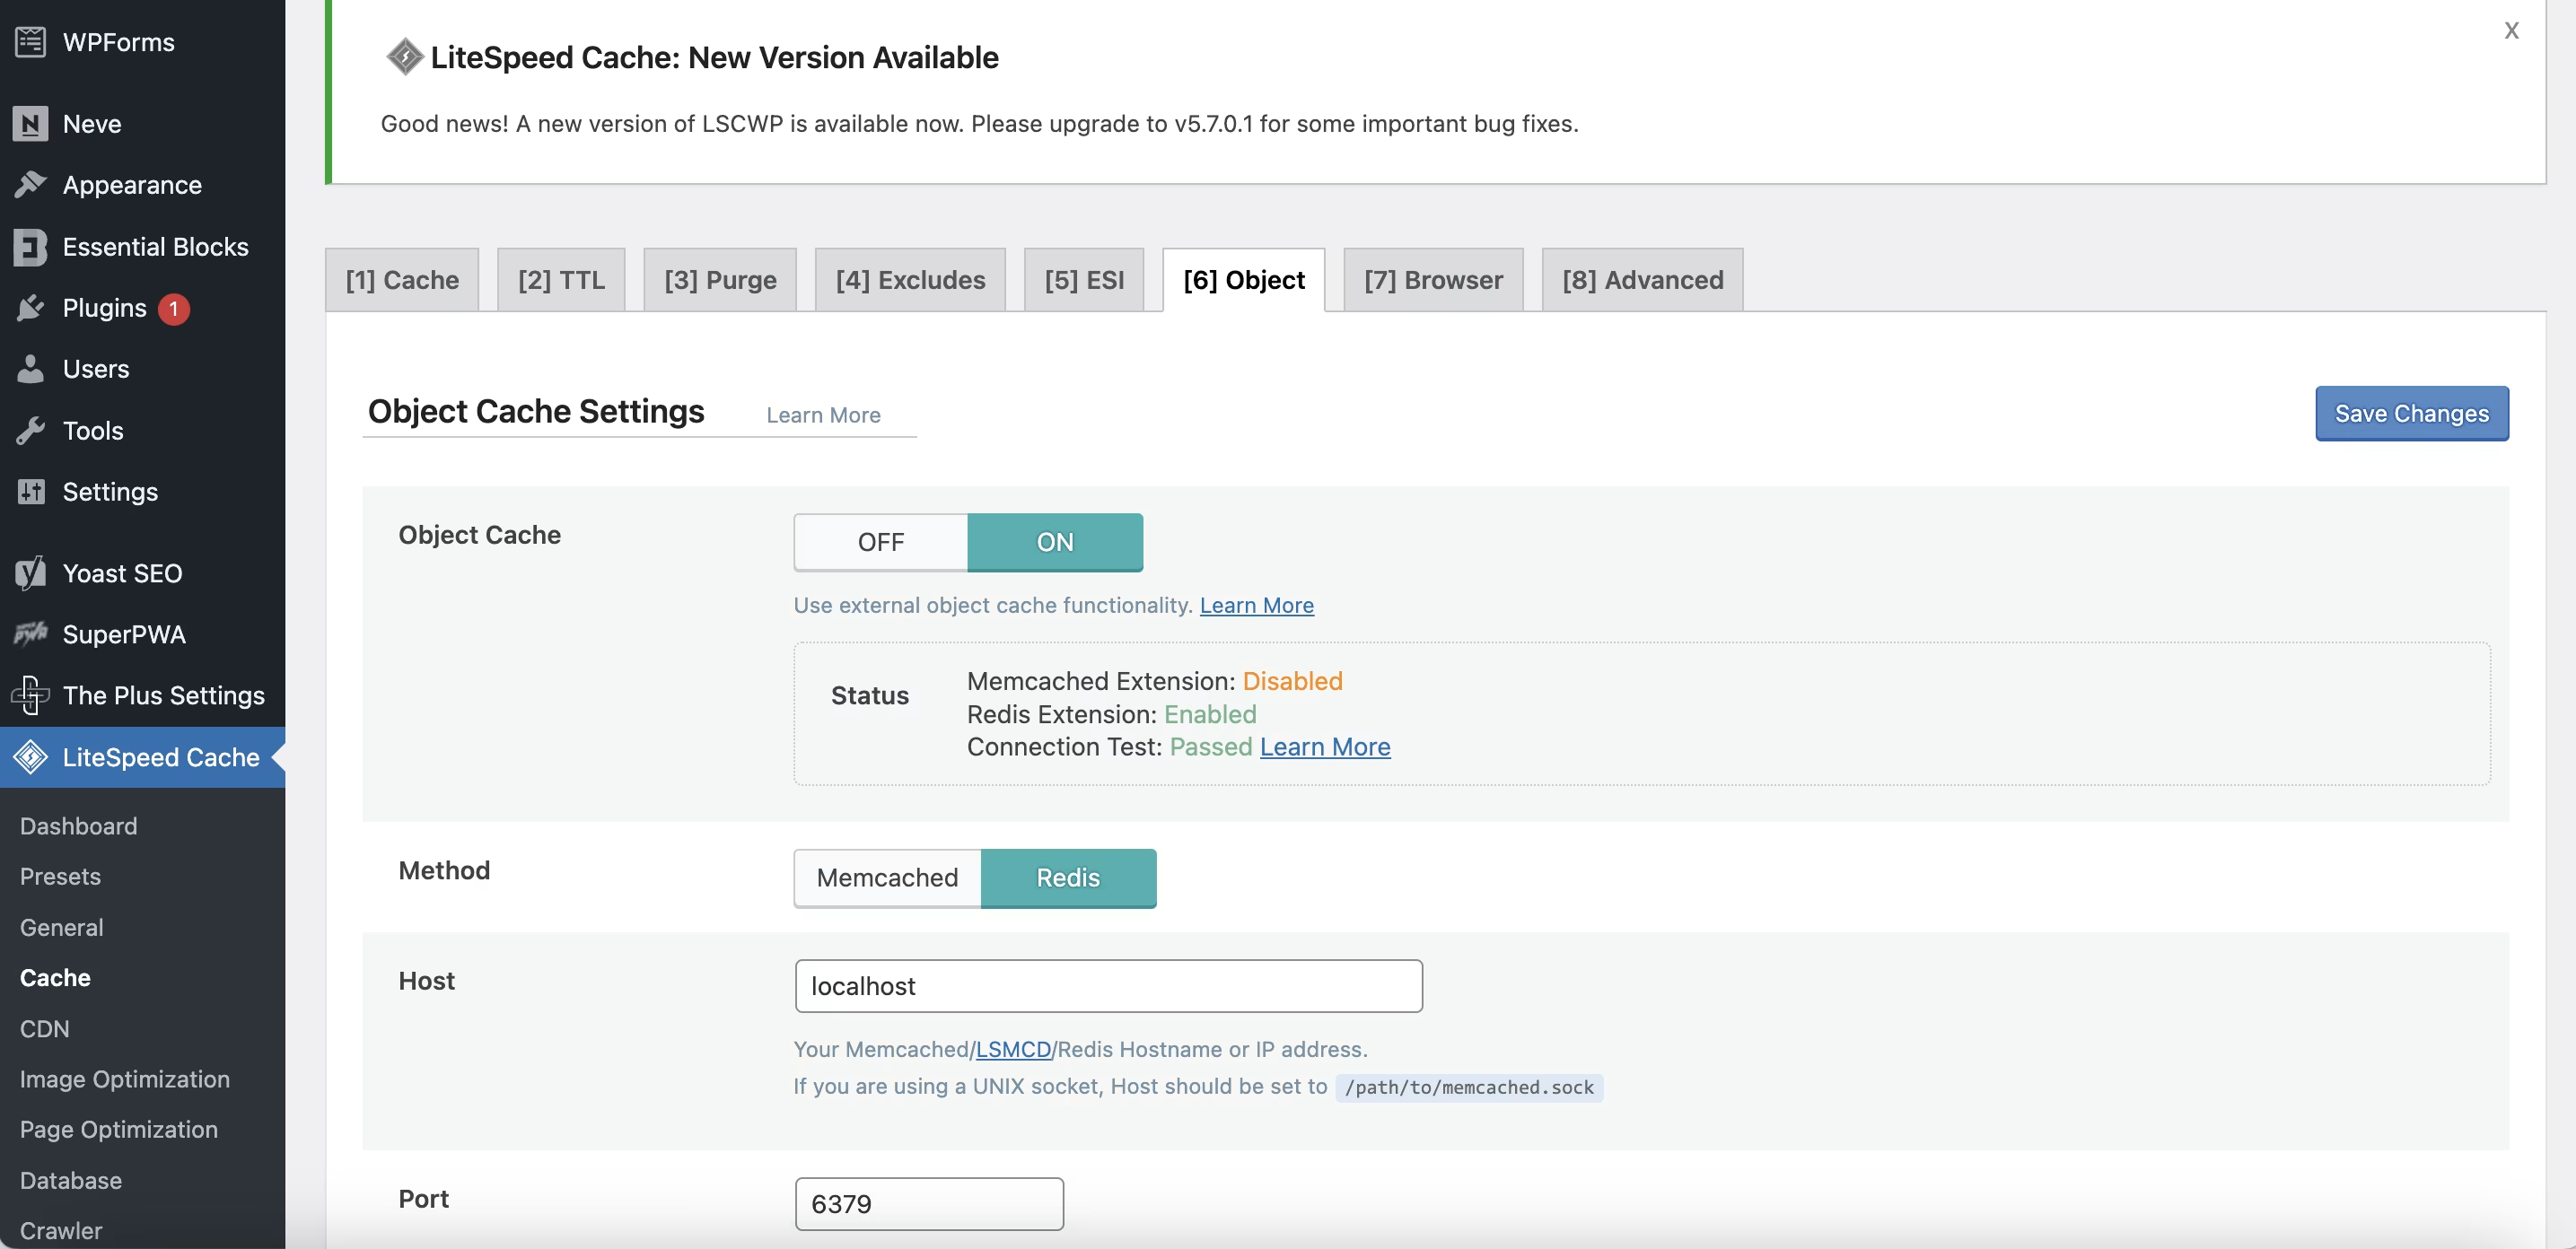
Save changes and Status should match the above picture.
Buy Wordpress Hosting Plan Here.